You should know that product shots are easy to do at home irrespective of whether you have a point and shoot (p&s) or a DSLR. Here's a quick 3 minute DIY (Do It Yourself) reference guide so you can start jewellery product shots at home today! There's really nothing to it, only carry some patience and a passion to learn :)
THINGS YOU NEED
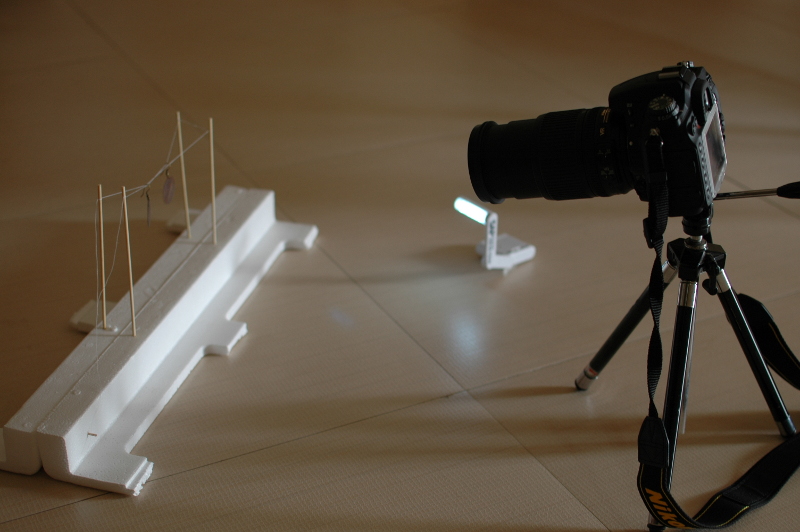
Now that you have your gear, just set it up as shown in the pic below and click away!
SHOOTING TIPS:
THINGS YOU NEED
- A set of earrings
- Wooden skewers - 4 units
- White thread (or any other colour depending on your background/product)
- A thermocol base
- Any p&s/ DSLR
- A tripod
- Additional lighting (LED) if possible
- ML L3 wireless remote trigger (if nikon DSLR)
Now that you have your gear, just set it up as shown in the pic below and click away!
SHOOTING TIPS:
- Use the remote wireless shutter to trigger the shot, this will reduce the minute camera shake that happens due to the action of pressing the shutter
- For p&s cameras, use the 5~10 second timer, it works just as fine
- Ensure no wind/breeze is circulating in the room, it tends to shake the product
- Adjust the lighting to ensure shadows and highlights are just the way you want it
- A 45 degree angle of light is ideal (early morning shots with the door open is the easiest way to achieve this)
- Diffused lighting is ideal, avoid harsh/bright lights
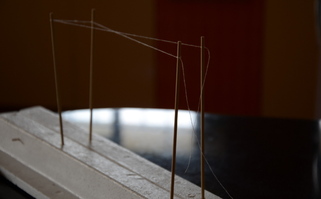
- Cross-thread the string as shown below and hang the earring loop across both lines to stop it from swinging
- If p&s then use the macro shot preset, if DSLR then use the max f-stop (ie 2.8, 3.5, 5.6 etc depending on the lens). This will ensure you get a shallow depth of field (DOF) or in layman's terms, blurry background. Blurred backgrounds really pop the product out and bring attention to it instead of the whole photo
 |  |
POST PRODUCTION
Once you've clicked your shots, its time to review them on a larger screen, aka, laptop/desktop.
Hope this short article was useful and you have been inspired to DIY at home. More DIY topics coming soon, so stay tuned! I'd love to hear your comments, do drop a line below...
Cheers/Chris
Once you've clicked your shots, its time to review them on a larger screen, aka, laptop/desktop.
- You can use free tools for windows, like Picasa, or GIMP in Linux (ubuntu). These are my 2 fav's for either O/S.
- If you are a beginner, stick to Picasa to highlight and sharpen your images as necessary.
- If you have a little more experience, you can try GIMP for windows or GIMP on Ubuntu. I used to use Photoshop earlier, but i find GIMP is just as easy to use and importantly, FREE!
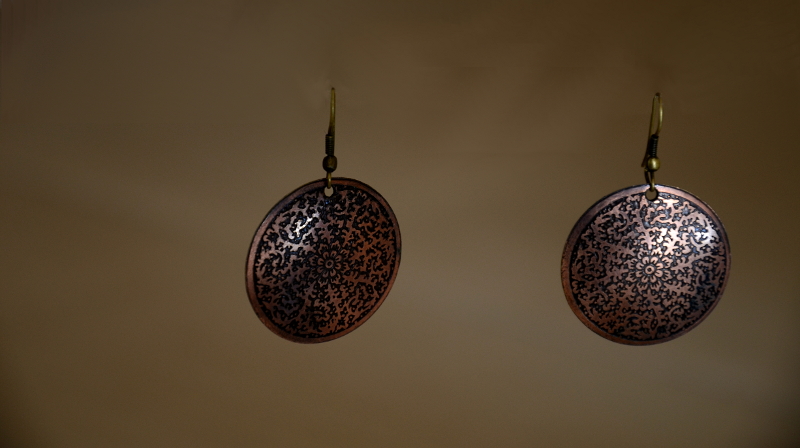
- Using Photoshop or GIMP, you to 'clone' away the thread so that you get something like the shot above.
Hope this short article was useful and you have been inspired to DIY at home. More DIY topics coming soon, so stay tuned! I'd love to hear your comments, do drop a line below...
Cheers/Chris

 RSS Feed